Showing posts with label Candy. Show all posts

Thursday, July 8, 2010

1st Annual Roast and Toast

Ok. So I have come to the realization that wherever these two boys are at.....it's trouble. Trouble in so many ways. Just thought that I would get that out there before I decided to proceed.

We decided to have a Roast and Toast. Definition would be that we wanted to roast and toast unusual things. Edible, of course, but unusual. After a trip to the grocery store (and $65 later :/),
we mamaged to purchase a whole schlew of things that could be easily roasted with the fire's glowing warmth. Yet, somehow, we felt that mountain pies were a must. Behold, the finest mountain pies to ever grace your computer's screen.
First off, we are all well aware that it is imperative to butter the outside pieces of bread before placing them in the mountain pie maker. Well, we though spray butter would be ridiculously effective (and 0 calories a squirt). However, after an 1/8 of an inch of pure ash on out mountain pies, spray butter was out, and real butter was in. I'm just warning you for your future spray butter ventures...don't do it.

The second mountain pie, pizza edition. We have discovered something heavenly. Have you ever been to Carraba's? You know, that delicious Italian restaurant that has heavenly foccacia and dipping oil with spices. Well, I have found the spices. Thanks to Jeff Crossgrove for enlightening me about this subject. Go to Weis, purchase the McCormick Italian Seasoning Grinder. Place it on absolutely everything you eat. It will change your life.


Jared decided that instead of letting the second mountain pie to become ash again, that keeping an eye on it wouldn't be a bad idea. I, on the other hand, was so paranoid about it burning again....that I just opened it up every 24 seconds. But, it paid off......scroll down a little more
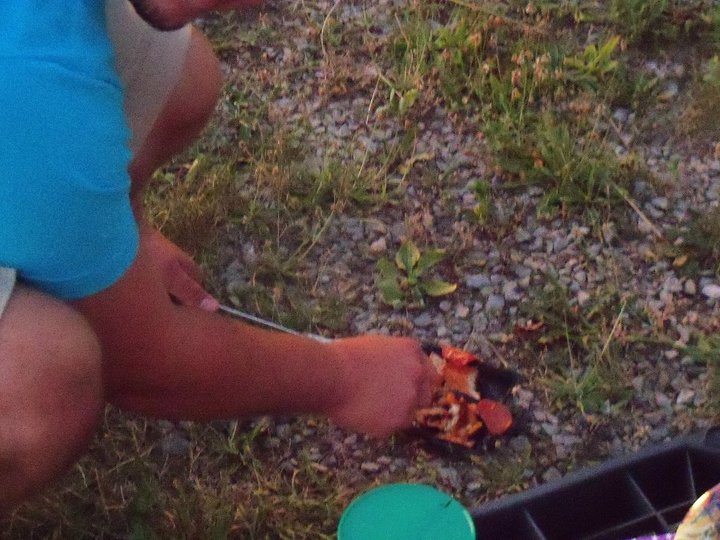


Oh, no, keep going. (This is Jared's mountain pie fail)


Ahhhhhhhhhhhhhhhhh, mountain pie heaven. Do you see how perfectly golden those edges are. Sourdough bread kissed with light mayo, Italian Seasoning, fat free cheese, and brown sugar ham. I want to eat these in heaven one day....and be the envy of all mountain pie rookies.

And then, the fun started. Carmelized Swedish Fish anyone? Jared made me do it.

But the mother of all concoctions that we attempted was this. Swedish Fish Fire Jelly.
It sucks.

Wednesday, June 9, 2010

Chocolate Chip Clusters With a Side of Graduation

Ok, so these look like crap. Well kind of like a pile of crap on a chip. But even with this slightly disturbing thought in the back of your mind....you must bear with me here. These are wonderful.

See, I never thought that I would end up making "chip clusters." I means, I have seen chocolate covered chips before....but these are the next step in the chocolate chip frenzy. (Yes..these are going to be big!)

So, I had some left over chocolate after making some graduation cake balls for Jarebear. So the only thing that I had near me were some Middlesworth chips. So, it was only natural for me to not waste the chocolate. I mean...it's chocolate we are talking about here.

I took some big chips...and set them down on some parchment paper. Then I crushed up some chips and swirled them in with the chocolate. And I though....ahhh HAH! Chocolate chips clusters on chips! It's brilliant...or at least I thought so!

Chocolate Chip Clusters
  • chips
  • melting chocolate
  1. Place large, flat chips on parchment paper about 1/2 inch apart.
  2. Crush up some chips and mix with some melted chocolate (the mixture shouldn't be runny)
  3. Place a spoonfull of the mixture on top of each chip. Let set.
  4. Cover with sprinkles, sugar, or icing....and MUNCH!
and here.....here was how the chip clusters became born. I had extra chocolate left over from making those de---licious cake balls for Jared...and a cake. I mean...it's me. I couldn't just ..not make him a cake...it's me...that would be..like...sacreligious or something. I got lots of compliments....but above all....I've heard my cake is pretty moist..which is a good thing. Speaking of compliments...I have gotten some pretty weird ones over the past couple months...I will share:

After sampling some of my frosting, a man uttered "Can I please marry you?" Let me also point out that this man is married. He also tried to clear the air by adding. "Oh...Oh..I mean only for your food."

Thanks....I feel so loved.

After eating all of my treats at Jared's house..a friend of Jared's sister aparently wants to move in with me....again...just for the cooking.

I'm glad that people love me for more than my food ;)

I can't share any more...they just make me feel so insecure about myself...haha...what a joke.

Happy Graduation Jared! Thanks for being my culinary inspiration!

Monday, April 5, 2010

Some Traditions are just THAT Important: Eastery Eggs


This is probably one of my favorite traditions EVER! Not only do these consist of my three favorite things (peanut butter, coconut, and powdered sugar), but they are super cute! I can't wait to show you this!
Now I thought that I would first show you the disturbing Easter Egg Scene that we made. My brother, Jared, and I were getting a little fatigued and cutness was far far behind us. We started going gorry. I think it has class. In case you were wondering, the large disturbing Easter egg was my brothers responsibility (no surprise there).

Also before I lay down the coveted family recipe, I thought that I would also say that Jared Smith is responsible for many of the decorations as well. (Must give credit where credit was due!) Thanks mom and Blake too!

Here we are! My favorite favorite favorite favorite Easter reipe for peanut butter eggs.
Crispy Peanut Butter Eggs
Items Needed:
  • 1 stick of margarine or butter (softened)
  • 2 cups of peanut butter
  • 3 cups 10x sugar
  • 4 cups rice krispies
  • milk or white chocolate melting chocolate

  1. Combine peanut butter and margarine until smooth. Mix in the 10x sugar and rice krispies(must use hands, and they MUST get dirty...or they just won't taste as good!)
  2. Squeez into balls or eggs or place into molds (like we did in some of the pictures.) You can also just stick them in your mouth and eat.
  3. Cool in the refrigerator, and coat with milk or white chocolate.
  4. Store in the refrigerator (makes about 20-25 eggs per batch)
Oh dear, oh dear, oh dear. Look at that. Look at that and tell me that they don't look like a bite out of heaven. I'm pretty sure that if heaven was made of this stuff...I would be a happy camper.
We pushed some of the mixture into mold and coated them in chocolate. We poured chocolate into the mold, let set. Then we pushed some of the mixture into the mold, and covered the top with more chocolate. Let cool, them pop them out and enjoy your cuteness!


Bunnys! Oh dear, more cuteness! Thank you to Jared for trying sooooo hard to make those eyes stick on there perfectly.


A pink chocolate drizzle and some sanding sugar! Any idea to why the sugar seems clumped on the eggs? Well, you can thank Jared's moist hands. I think you can figure it out from there.


Yeah, more cuteness!

Next, on to the coconut eggs! (We made them into balls so that you could tell them apart from the peanut butter) Also, it makes for a delightfully cruel joke to those who don't like coconut. Tell them that the egg shaped ones are coconut and the ball shaped ones are peanut butter. hehehe!


Coconut Cream Eggs
Items Needed:
  • 8 oz. cream cheese
  • 1 stick margarine
  • 4 c. Angel Flake coconut
  • 8 c. 10x sugar
  • melting chocolate for coating
  1. Combine cream cheese, margarine, coconut, and sugar. Mix well.
  2. Shape into eggs (or balls as we did). Cool before coating.
  3. Cover eggs with melted chocolate. Let set.
  4. Enjoy right away because you can't wait...or store in the refrigerator.

Makes about 30 eggs.


Here they are all dressed up and ready for the Easter Table. I must tell you, see my mother is the beholder of this recipe. She placed it in a special church cookbook. The recipe was doubled in the cookbook because she usually doubled the recipe. Unfortunately, she didn't remember that she had doubled the recipe in the cookbook, and well...yes....we made a quadrouple batch. Let's just say....we had a dusting of powdered sugar ALL OVER. It really didn't quite make it all in the bowl....but it worked out for the better. We had so many extra of these that we HAD TO EAT THEM! It was unfortunate....yeah...actually not so much!


And then, I packaged them all pretty, and off to some of our loved ones! (I stored a few secret ones in the refrigerator...don't tell!)


The great thing is that you can make these into any shape that you so desire. Christmas, Halloween, Thanksgiving, President's Day, Easter, Christmas, whatever you desire. Actually, just make up a holiday..and you can have these whenever you would like!

Thursday, February 4, 2010

Valentine Flavored Rice Krispie Hearts

I've found it. You know, I've found my perfect rice krispie treat. Not only are they pink...and full of pink candies...but they are strawberry flavored...and in the shape of hearts! If you were to draw a picture of me....this is what it would look like.

So...a man from my church decided that he would give me some "baking advice." Well...not really advice, as much as prompting for me to bake him something that he desired. He told me to try strawberry marshmallow rice krispie treats. At first, the combination of rice krispie and strawberry didn't at all seem pleasant to my taste buds....but lo and behold...they are gold! (Plus really cheap and easy to make!) You can even wrap them up in little cellophane bags and give them as gifts for Valentine's Day!

Valentine flavored Rice Krispie Hearts

Items Needed:
6 cups of rice krispie cereal
3 TBSP. butter
One bag of strawberry marshmallows
3/4 cup of Valentine M&M's (more or less depending on you)
Chocolate Melting Wafers
Directions:
1. Pour 6 cups of rice krispies and m&m's into a large bowl. Set aside.
2. Melt the butter in a large bowl in the microwave. Add marshmallows and microwave one minute longer. Stir, and microwave on 20 second intervals until smooth and combined.
3. Pour the hot mixture over the cereal mixture and coat all of the cereal.
4. Pat mixture into a buttered 9*13 pan. Use a piece of wax paper or buttered wooden spoon.
5. Refrigerate until set. Cut out shapes using a heart cookie cutter.
6. Drizzle with melted chocolate melting wafers and let set.
7. Place in bag with cute ribbon and give it to your sweetheart (haha word pun!) or place them on a platter and DIG IN!

Before they are drizzled with chocolatey goodness. Guess what, they are still amazing...even without the chocolate!!


If there is one thing in this world that is absolutely fantastic. It's melted chocolate. Yes, I caught myself....going to the cabinet...grabbing some pretzels...and enjoying the melted brown stuff. So...whoever had one of these....I'm sorry if there are a few pretzel crumbs....hehehe.


What is better than making your dessert into pretty shapes?
Now it's your turn to make an edible Valentine!


Sunday, January 24, 2010

Almost Great Grandma's PB Butterscotch Bars

The plateau of butterscotch and peanut butter up there, yeah...well...let me tell you a small story. Ever since I can remember, my dad would make these peanut butter butterscotch treats for us. (Yes...my dad!...amazing that he actually made something..don't worry this was the only thing that he made..other than grilled cheese sandwiches haha) Anyway, we looved these, and he loved them because his grandma ALWAYS would make them for him.

Some time ago, the recipe disappeared and dad couldn't remember what had gone into them. So, I felt that it was my duty to "recreate" it. This meant alot to him. And try after try, dad would voice that they "just weren't the same"

Well friends, I finally got it...and it's ober simpler that I had originally thought. I finally got the sign of approval from the one that mattered...dad. I was jubilant.

Great Grandma's PB Butterscotch Bars
Items Needed:
6 cups Kellogs Rice Krispies Cereal
1 cup creamy peanut butter
1 bag butterscotch morsels
Mini marshmallows (for decoration)..actually because I had 22 random marshmallows that needed a home...thats the only reason I put them on there.
Directions:
1. Butter a 9*13 pan, set aside.
2. In large bowl, add the rice krispies. Set aside.
3. Melt the peanut butter and the buttersotch morsels in a microwave safe bowl for one minute, stir until melted thoroughly.
4. Add the peanut butter mixture to the rice krispies until completely covered.
5. Pat into buttered pan with the back of a buttered spoon.
6. Refrigerate until firm, cut into squares, and serve. Store refrigerated.


Friday, December 25, 2009

Chocolate Covered Fantasy


Chips, marshmallow, and peanut butter filled ritz are shown in this picture.
The wonderful thing about chocolate is that it tastes good on pretty much everything. Yes, there are a few exeptions to the rule...but you catch my drift.
Here are some other fun things to chocolate cover:
animal crackers
cereal clusters
peanut clusters
rice krispie treats
1/2 dip cookies
ritz bitz
mini oreos
teddy grahams
graham crackers
vanilla wafers
carmels
peanut butter globs
Use your imagination!


Gingerbread, Truffles, and Gobs Oh My!

No, My Christmas baking was NOT complete. I needed more! MORE! So, I did. And they are so cute, if I do say so myself. I have a teeny tiny feetish with midget gingerbread men!

So, not to dissappoint, but I didn't make these frome scratch. But, taking the gingerbread cookie dough and adding a bit of flour to it, and cutting out little midget men is practically like I homemade them. So, I did..in my mind.

PS Pillsbury gingerbread cookie dough is the best!! Above, I gave these cute little midget's pants and some mini mini gingerbread sprinkles. (My mother adivsed me that they look like mini gingerbread feces...thanks mom....love you too.)


Gingerbread Sandwich cookies. Easy as cutting out gingerbread cookies, adding my whoopie pie filling, and sandwiching together!


Peanut Butter Oreo Truffles. One word....YUM! They are so good...really....like sooo good. They are soo easy too, and you can make so many different variations.


Peanut Butter Oreo Truffles

Items Needed:

One pack of peanut butter stuffed oreos

One 8 oz. package of softened cream cheese

Melting chocolate


Directions:

1. Crush whole package of peanut butter oreos.

2. Stir in softened cream cheese.

3. Roll into small balls, and refrigerate until hardened.

4. Coat in chocolate, and enjoy!

Makes approximately 30 minutes.


Mint Oreo Truffles! (A variation! I love variations!!)

Make just as the peanut butter truffles are made, only substitue mint oreos for the peanut butter.

You can also make strawberry milkshake oreo truffles, regular oreo truffles, and golden oreo truffles.

The whole little plate of truffle delight!

These are my "I had alot of extra stuff left and I needed to use it" gobs. Actually, they are quite scrumptious.
Christmas Gobs
Items Needed:
Randomn Amounts of the following:
Melted White Chocolate, Cherrios, Peanut Butter M&M's, and chips
1. Combine and pat into buttered pan. Let set, cut when set! YUM!!


Epic Coconut Marshmallow Fail

Yes, and epic fail. Well, sort of. I realized the other day that I had never tackled the marshmallow project, homeade marshmallows that is. So, I found a marshmallow recipe..and went to work.

As you can see I made one mistake in this picture. Yes, that is a meat thermometer and no, I do not own a candy thermometer as it suggested to use. it didn't bother me to bad. Another issue was the fact that I needed the sugary substance to come to 240 degrees...which as you can see...wasn't even listed on the thermometer.
Then, I beated it. For about 20 minutes. My poor kitchen-aid got so hot that I thought it was going to explode. It didn't though..that made me happy. After I was done mixing I poured it into a pan, but it didn't move. It hardened half way between taking it out of the mixer and pouring it into the pan, partly the reason I don't have a picture of the finished product. I will say, the taste wasn't bad...but i also forgot to butter the aluminum before putting the marshmallow on it. So...yeah....not so good. But...be my guest and try to make this sticky, icky, homeade substance yourself!
Homeade Coconut Marshmallows
Items Needed:
  • 2 teaspoons butter
  • 3 envelops unflavored gelatin
  • 1 cup cold water, divided
  • 2 cups of sugar
  • 1 cup light corn syrup
  • 1/8 teaspoons salt
  • 1 teaspoon coconut extract

Directions:

1. Line a 9*13 pan with aluminum foil, cover with butter

2. In a large metal bowl, sprinkle gelatin over 1/2 cup of water, set aside.

3. In large saucepan on stove, combine water, sugar, light corn syrup, and salt. Bring to a boil, stirring occasionally. Cook without stirring until temperature reads 240* or soft ball stage.

4. Remove from heat, and add gradually to the gelatin mixture. Beat on high speed approximately 15 minutes (should be doubled in size.)

5. Beat in vanilla, pour into prepared pan. Let set for 6 hours to overnight.

6. Cut with knife coated in cooking spray. Roll in powdered sugar, coconut, sprinkles, or coat in chocolate.

Have fun!

Sunday, December 20, 2009

"From the Kitchen of Lauren"


From the Kitchen of Lauren. All of those lovely cookies needed homes. So..I packaged them up all sweet and pretty...and gave them to all of our friends! Take a look!
A few pictures of the finished product! Now, which one to eat first..........hmmmmmm?


Patties and Brownie Cut-outs!

Yes, Baking Day continued. I wasn't lying when I told you this was serious business. And now for a recipe that I make every single year. Homeade Peppermint Patties. Let me just say...you are going to want to adapt this into your yealry Christmas baking ritual.


Homeade Peppermint Patties
Items Needed:
1 14-ounce can Sweetened Condensed Milk
1 tablespoon peppermint extract
green or red food coloring
6 cups powdered sugar
Melting Chocolate
Directions:
1. In large bowl, combines sweetened milk, extract, and food coloring until smooth. Gradually add sugar and combine until well-blended. Knead lightly on floured surface. Shape into 1-inch balls. Place on parchment and slightly flatten into a patty-shape. Let dry in refrigerator 0ne hour. Flip over, and dry one hour longer. Melt chocolate, coat, and let set. ENJOY!

Chocolate Brownie Roll Outs (thank you SmittenKitchen!)
(Ps A NEW FAVORITE!)
Items Needed:
3 cups all purpose flour
1/2 teaspoon salt
1/2 teaspoon baking powder
One cup softened butter
1 1/2 cups sugar
2 large eggs
one teaspoon vanilla extract
2/3 cup unsweetend Hershey's Cocoa
Directions:
1. Preheat oven to 350*. Line cookies sheets with parchment paper.
2. Combine flour, salt, and baking powder in bowl and set aside.
3. Mix butter, sugar, vanilla, and eggs in a large mixing bowl. Gradually add flour mixture.
4. Wrap in plastic wrap and refrigerate for one hour.
5. On heavily floured surface, roll out dough. (Flour will bake off-don't worry!)
6. Cut out cute shapes! Bake for 8-11 minutes depending on size. They will be soft in the middle and pretty set on the edges.

The brownie roll-out cookie recipe cut with a teeny tiny flower shape cookie cutter.
Brownie cut-outs reindeer style. (Actually...rudolf style.)


Blog Template by Delicious Design Studio